
Urbit x S3 (For Dummies)
Urbit x S3 (For Dummies)
Configuring S3 storage for your Urbit ship.

Welcome, Crypto Dummies!
If you’re new here, this substack is focused on educating those of you that know nothing about crypto and blockchain technology.
If that’s you, you’ve come to the right place!
Throughout the past couple of weeks, we have taken the time to dive deeper and deeper into Urbit. If you're still a little confused about what Urbit is or how it works, check out these posts below to get up to speed:
Today we’ll pick up where we left off and show you to set up the finishing touches to your Urbit planet!
Let’s get started!
Configuring S3 Storage for your Urbit Planet

By now you should have your Urbit ship up and running and accessible through any web browser via your Droplet’s native IP address. We’ve been using Digital Ocean to configure and host our Urbit planet and today we’ll add some finishing touches and get started with storage.
S3 is a Simple Storage Service, we’ll be using this to set up a hard drive for your Urbit server to support any files larger than text. The official S3 is a product of AWS, other services, like Digital Ocean, run compatible services that are built to be interchangeable with AWS S3’s API. Digital Ocean’s version of this is called spaces.
Step 1: Navigate to Digital Ocean and Create a Space
We’ll navigate to the same home screen we used to create our Digital Ocean droplet and begin by searching for spaces in the dropdown menu.
Configure your space settings by:
Choosing the data center closest to you
Leave CDN disabled.
Restrict File Listing
Give your space a unique name, select your project, and click create a space.
We’ll be redirected to our spaces page and navigate to the settings.
Under CORS Configurations, we’ll click Add and input 3 rules
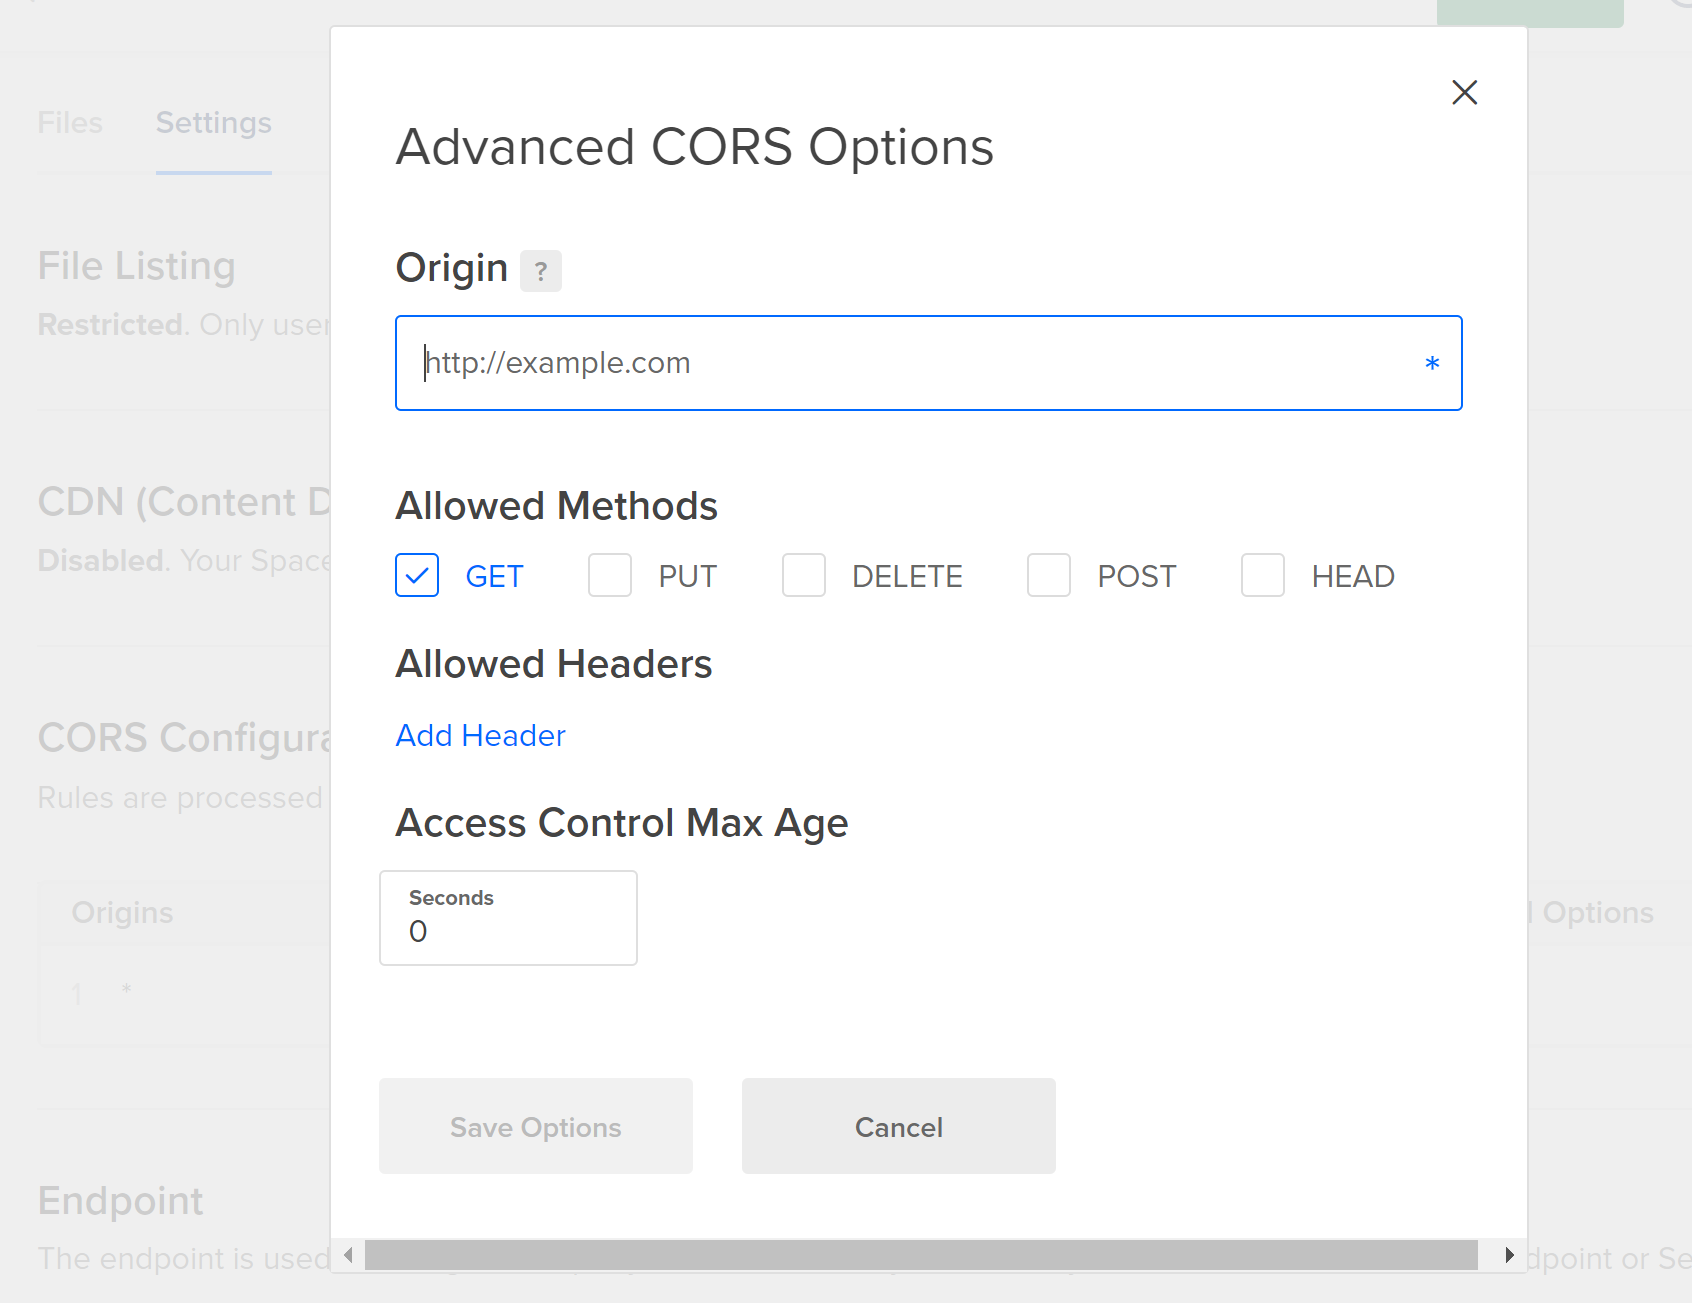
In the Origin box put a “ * ” and check: get and put under allowed methods.
Next, click on Add Header, and input another “ * “.
We have one last step before we can enable our newly created space with our Urbit planet. We’ll scroll down the sidebar and look for API.
We’ll be greeted by an Applications and API page and from here we’ll scroll down to spaces access keys.

Select Generate New Key, give it a unique name, and click on the checkmark.
This will generate two lines of random text and will serve as a username and password.
Keep both of these for our next step, and do not share these keys with anyone unless you are willing to give them access to your storage.
Step 2: Enabling S3 on Urbit
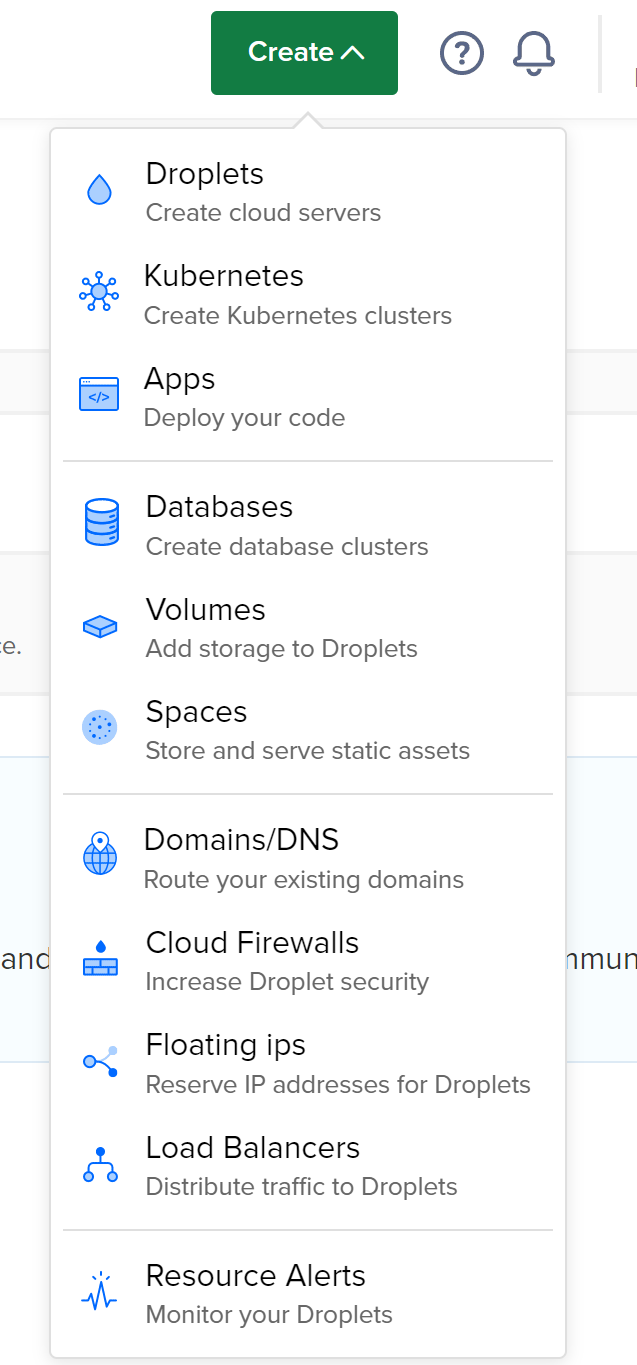
Next, let’s navigate to our Urbit landscape and access the ‘groups’ application.
Next, we’ll click on our profile and access System Preferences.

Now let’s navigate to remote storage and configure our settings.

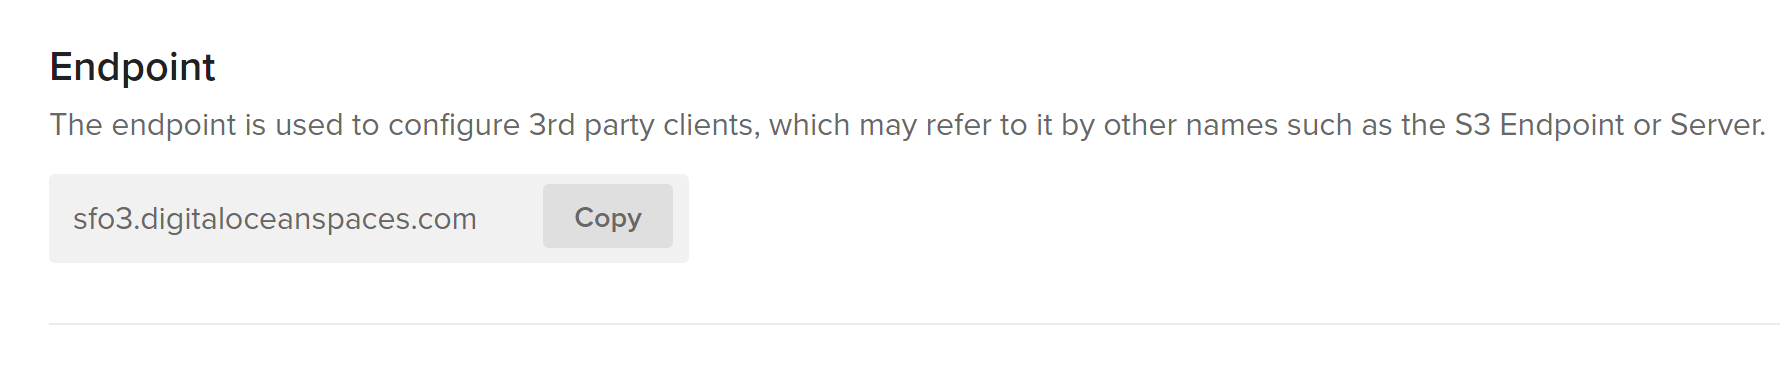
We’ll paste our spaces access key ID and Secret Access Key in the corresponding fields, and navigate back to our Space settings to copy and paste the endpoint address in the corresponding field.
Once this has been filled out, we’ll scroll down to S3 buckets, click add new bucket, and enter our space name.
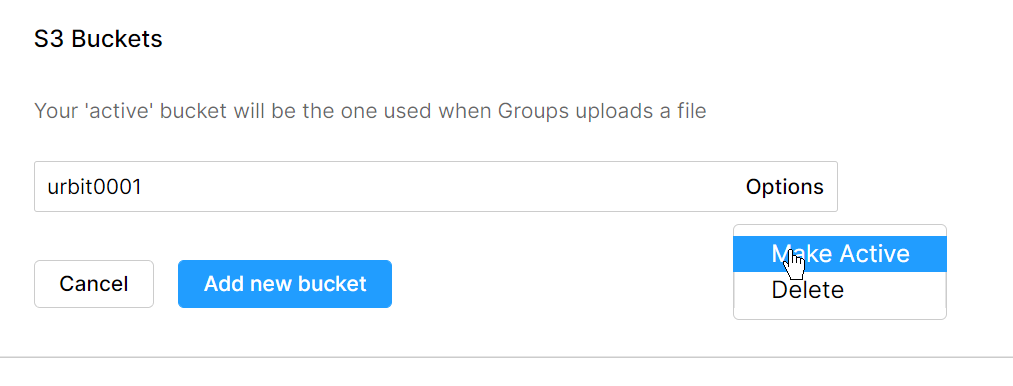
We’ll navigate to Options, select make active and hit submit.
Now we’re all set for storage on our Urbit Planet!
Custom Domain for your Urbit Planet
Congratulations!
You have successfully booted your planet and configured your storage settings.
As of right now, your planet is accessible via your droplet’s native IP address on any standard web browser. This may not be the most practical way to access your Urbit planet, so we’ll show you how to obtain a free subdomain for your Urbit ship.
Navigate to your Urbit ship via IP address and access the terminal app, this will open dojo the command line interface for Urbit.
Enter the code below:
-dns-address &dns-address [%if .000.00.000.00]Replacing .000.00.000.00 with the IP address of your Droplet, let it run, and once you receive a confirmation message saying: confirmed access via ship.arvo.network, you will be able to access your ship through your-planet.arvo.network (replacing your-planet, with your ship’s name).
The Tlon corporation offers this free subdomain service under arvo.network, making it easier to access your ship through a custom subdomain.
However, these requests are manually filled and make take a couple of days to register. You check the progress by running the code below in your Urbit dojo
:acme %retry Congratulations dummies! You have completed the setup for your Urbit planet!
As of now, some of the main use cases for Urbit are similar to that of Discord, featuring private group chats, shared journals, and personal blogs. What makes Urbit so incredibly different is the opportunity for developers to build free decentralized software for all users on the network.
Next week we’ll dive into some of the available applications and show you how to direct your Urbit ship to a personal domain if you already own one. We’ll see all you dummies next week!